When launching Psykinematix for the first time, a "Setup Assistant" panel helps you configure the application in terms of registration, preferences settings, and initial calibration. After this initial setup and for each subsequent launch, Psykinematix presents the user with the default Help panel.
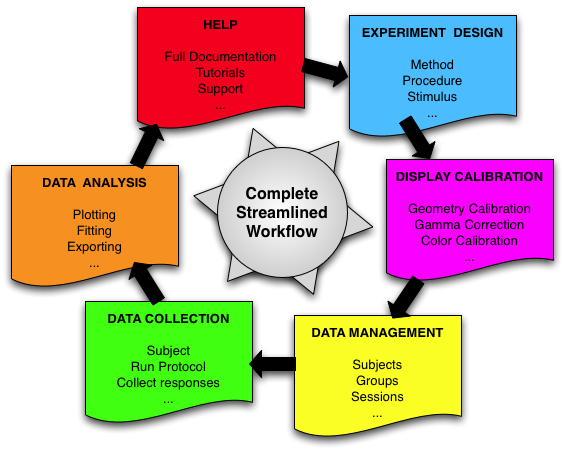
Psykinematix is designed so the user is only shown with relevant information conveniently accessible from the toolbar at the top of each Psykinematix window. This toolbar includes several tools to create your psychophysical experiments, calibrate your visual stimulators, plot and analyze your data, as well as manage your subjects, experimental groups, and sessions. These tools provide direct access to each component of your workflow. Clicking on any of them brings the specified tool window forward.

These 5 tools are:
- the Designer tool to create the experimental protocol in term of an events hierarchy. A wizard is also available to create “canned” experiments.
- the Calibration tool to measure the display geometry, perform the Gamma correction and specify the color properties of the display in term of colorimetric or radiometric measurements.
- the Subject tool to manage lists of the subjects and groups as well as the experimental sessions run by each subject.
- the Plotter tool to visualize and analyze the session results. Data can be fitted with various psychometric functions. Graphs and data tables can be printed or exported to Excel files.
- the Help tool that provides the full documentation, and access to tutorials for each component.
Click on any of the icons below to access the help page for the selected tool.

Before browsing the Help pages, we recommend that you follow the faster learning curve through the available tutorials to get familiar with Psykinematix philosophy. You may also start with the following sections:
Setup Assistant
Menus
Preferences
Understanding Psykinematix Files
Tutorials


