


The Preferences panel allows the customization of many aspects of Psykinematix:
Admin
Display
Response Devices
Input/Output Devices
Sound
Reports
Timing
Defaults
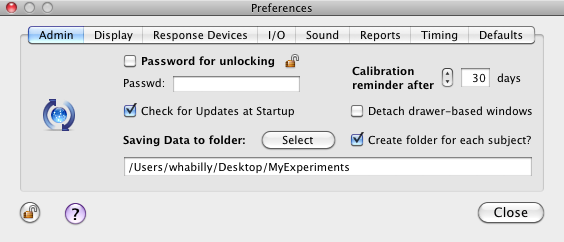
The "Admin" preferences provide options available only to an administrator:
-
A password can be set to prevent unwanted or accidental modifications across the various panels of the application protected by their locking status.
-
The update check box allows Psykinematix to regularly check the availability of newer versions (this requires an active internet connection).
-
The number of days before emitting a reminder about outdated calibrations can be also specified there.
-
The "Detach drawer-based windows" check box allows the presentation of some information into independent windows the users can reposition and resize as they want instead of presenting them inside drawer-based windows. The detachable windows are the experiment log window in the Designer panel and the data table window in the Plotter panel.
-
The folder where all experimental data are saved is selected by clicking on the "Select" button. A folder entitled "MyExperiments" is created on the desktop of the current user (~/Desktop/) by default. In this folder another folder entitled "Exp_$" is created for each experiment ($ is replaced with the Experiment ID entered in the "Session Information" panel). A folder entitled "Subject_$" can be created within the experiment folder for each subject if needed ($ is replaced with the Subject ID). The data collected for all sessions run for this subject and for this experiment are saved in the deepest folder of the file hierarchy. Note that the session index is automatically incremented for each new session so that session data files are not overwritten. For more information about Psykinematix files, see the "Understanding Psykinematix files" section.
The "Display" preferences specify the display settings to be used by default by any new experiment you will be creating:
-
the stimulation display (when using an external display, the main or internal screen can be optionally blanked, see Default Preferences below).
-
the display resolution in terms of pixel numbers and frame rate (when using LCD displays or projectors it is recommended to use their native resolution).
-
the viewing distance expressed in millimeter (distance between the subject's eyes and the stimulation display).
-
the display size expressed in millimeter (width and height). Note that the initial size is an estimation provided by the operating system and does not necessarily reflect an accurate measurement. A geometrical calibration is required to more accurately estimate the pixel size and related parameters. Clicking on the small icon
 opens the Calibration panel.
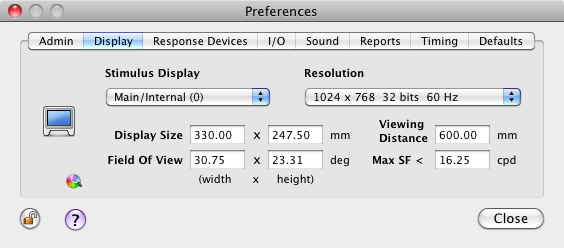
This panel also informs the user about the resulting limitations in the spatial properties of the stimuli:
-
the size of the field of view (FOV) expressed in degree,
-
the maximum spatial frequency (SF) expressed in cycle per degree (cpd) attainable on the stimulation display given the specified resolution and viewing distance, also referred to as the Nyquist or critical frequency.
Note that changing the value of the viewing distance, maximum SF, or size of the field of view automatically updates the values for other parameters. Changing the "Stimulus Display" or "Resolution" selection also updates the selection in the Calibration panel.
Other important settings related to the display (chromatic mode, color space, background color, etc) can be found under the Defaults section.
The "Response Devices" preferences specify the input devices used to provide the subject's responses during an experiment. The listed devices are only the HID-compliant (Human Interface Device) input devices that are currently connected like keyboards, mice, keypads, gamepads and joysticks. If some devices have been disconnected or connected while running Psykinematix, this list can be updated by clicking on the blue circular arrow ![]() . For other kinds of input devices see the "Input/Output" preferences below.
. For other kinds of input devices see the "Input/Output" preferences below.
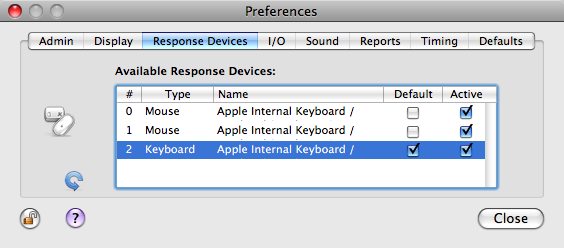
Note that only devices checked in the "Active" column can be used to collect responses, and only those checked in the "Default" column are used by default when creating new experiments. The default device can then be changed on an experiment basis in the Experiment properties under the Input/Output tab. When using multiple devices that act as keyboard, it is important to specify as default keyboard the one used by the experimenter to start and stop an experiment with the ESC keypress. See the "Supported External Devices" chapter for more details.
The "I/O" preferences specify the input and output devices used to trigger or send external signals for synchronization purposes during an experiment. Psykinematix aims to support as many devices as possible that can communicate with Macintosh computers through a USB, serial port, or IP-based network connection.
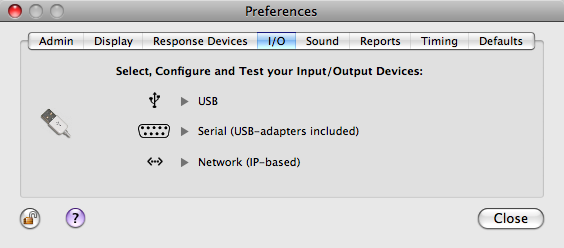
Clicking on the USB, Serial or Network check boxes opens a configuration window that lists all recognized devices of this type. This way, each device can be configured, tested, and enabled for experimental use. See the "Supported External Devices" chapter for more details. Note the circular arrow ![]() : clicking on it will update the device list in the table which is necessary if devices are connected or disconnected while Psykinematix is running.
: clicking on it will update the device list in the table which is necessary if devices are connected or disconnected while Psykinematix is running.
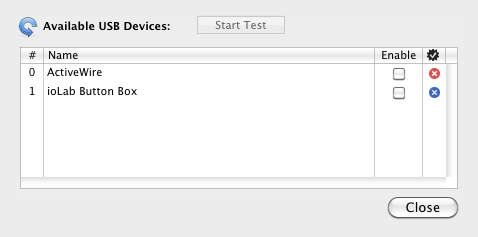
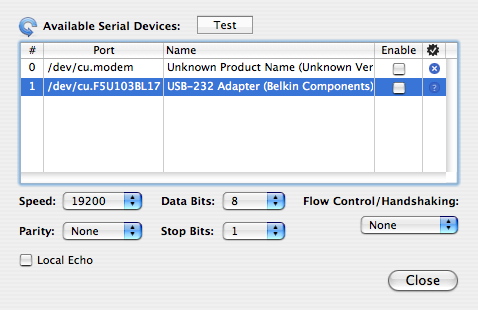
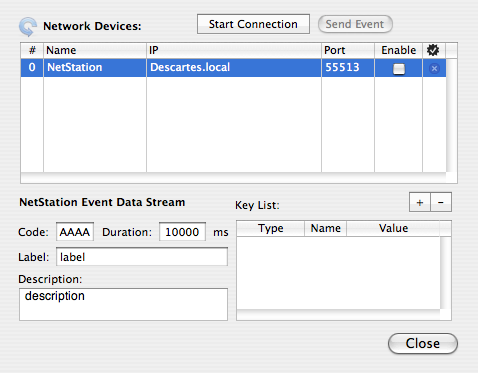
The last column in each device table indicates the status of each supported device:
Missing device
Failed Test
Passed Test
Device OK
All devices checked in the "Enable" column are used by default when creating new experiments and appear in the Experiment Input/Output settings where they can be removed if needed. These enabled devices are also those selectable from the "Trigger" pop-up menu in the "Control Settings" palette available for most stimuli.
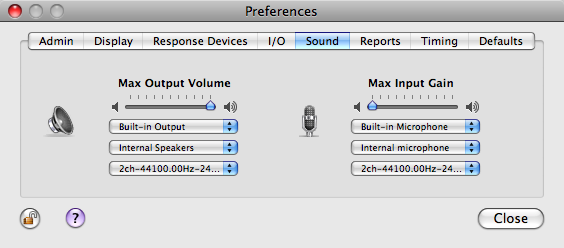
The "Sound" preferences allow the selection of the input and output audio devices along with their properties. Maximum output volume and input gain apply only when Psykinematix is running. System settings are restored upon quitting the application.
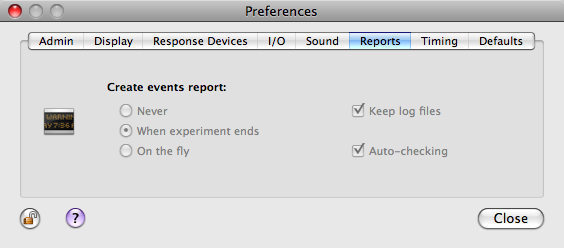
The "Reports" preferences specify if and when the event information is collected and saved, as well as whether a log file is kept for each experimental session. The "Auto-checking" option indicates whether the structure of the events hierarchy in the 'Designer' panel is automatically checked for validity.
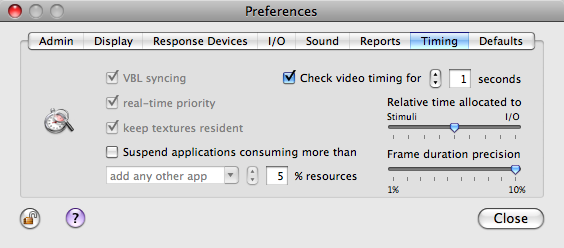
Various options are available to improve the visual timing (see the Timing section for more details). The following ones are set by default for optimal timing with most graphic cards:
synchronization to vertical blank signal (VBL),
real-time priority,
stimulus storing in the video memory.
Other options are customizable by the user:
suspension of time-consuming applications running in the background: checking the box labeled "Suspend applications consuming more ..." allows the suspension of the activity of all applications which use more than the specified % of CPU or memory usage before running an experimental session. When checked, this option also suspends some default Apple applications: Safari, Mail, iCal, and DashboardClient. You can find out exactly how much of the CPU is being used by each application by launching Activity Monitor (in Applications/Utilities) and looking at the "%CPU" column next to the application entry in the process list. All suspended processes are re-activated when the session ends.
-
checking of the video timing at the beginning of each experimental session for a specified duration: if the current display frame rate cannot be measured with enough accuracy and precision relative to the theoretical frame rate, the experiment is aborted with an error message. It is then recommended to close all unnecessary applications that may interfere with OpenGL or suspend them using the option described above.
-
setting the priority of the input/output operations relative to stimulus update between 2 VBLs: by default the priority is set so input/output operations take half of the duration of video frame. Allocated time to I/O operations can be lowered if stimulus update is more time-constrained or increased if I/O operations require a higher accuracy (eg: when measuring reaction time).
-
precision required for the frame duration and for diagnosis of timing issues: frames with a duration outside this range are reported as "missed".
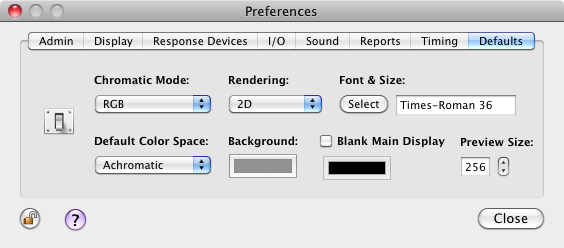
In this panel various miscellaneous preferences can be set to customize your experiments:
-
default rendering mode (see the Visual Stimuli section to learn more about specifying disparity or dichoptic parameters):
2D for single display,
-
Side by Side Stereo for stereoscopic display based on either free viewing, mirror-based stereoscope, or dual video outputs using the Matrox DualHead2Go video splitter (side by side or anamorphic format),
-
Frame Sequential Stereo for stereoscopic display based on stereo pairs presented sequentially at a high frame rate (typically 120 Hz) using for example a 3D graphics card such as the NVIDIA Quadro FX 4800 in combination with shutter glasses like REALD StereoGraphics CrystalEyes,
-
Anaglyph glasses with Red-Green, Red-Blue or Red-Cyan filters (make sure to select the correct left-right anaglyph option).
-
chromatic mode (see below for details)
-
color space to be used when creating and displaying visual stimuli: Achromatic, RGB, HSV, LMS, XYZ, L*a*b*
default font and size for text stimuli
default appearance of the background for the stimulation display
whether to blank the main display and with which color when using a second display as a stimulus screen
-
size of stimulus OpenGL preview in pixel units
Several chromatic modes are available:
-
RGB: This is the native chromatic mode for the graphic card, typically based on a 32 bit representation of each pixel, i.e. 8 bits for the red, green and blue guns in addition of a 8 bit alpha channel used for transparency. It provides 256 levels of red, green and blue, and should be used when presenting a mixing of achromatic and color stimuli.
-
Achromatic: This mode is based on the RGB mode converted to a 8 bit luminance output ( [R+G+B]/3 ) and a 8 bit alpha channel. It provides 256 intensity levels, and should be used when presenting achromatic stimuli only.
-
Mono 9.6 Bit-Stealing and Mono 10.8 Bit-Stealing: These modes improve the luminance and contrast resolution with the bit-stealing method (Tyler 1997) to a 9.6 and 10.8 bit resolution, which provide 766 and 1786 intensity levels, respectively. These modes should be used when an enhanced contrast resolution for achromatic stimuli is required. Best results are obtained when the R, G, and B guns settings are adjusted so:
- for the Mono 10.8 Bit-Stealing mode, the luminance of the green gun is twice that of the red gun, which in turn is twice that of the blue gun , i.e.: G = 2*R = 4*B;
- for the Mono 9.6 Bit-Stealing mode, the luminance of the red, green and blue guns follows the constraint: R = k*B and G = [2*(k+1)/k]*R with k>0 (for example if k = 2, then G = 3*R = 6*B).
-
Mono Bits++: This is the achromatic mode supported by the Bits++ device from Cambridge Research Systems which provides a true 14 bit monochromatic output. Note: this is a Beta feature that requires users feedback! (see the Psychtoolbox wiki section "BitsPlusPlus Variations in OpenGL Functionality Across Platforms" for some possible solution, in particular point 5).
-
Color Bits++: This is the chromatic mode supported by the Bits++ device which provides a true 3x14 bit true color output by sacrificing horizontal resolution. Note: this is a Beta feature that requires users feedback! (see the Psychtoolbox wiki section "BitsPlusPlus Variations in OpenGL Functionality Across Platforms" for troubleshooting some possible problems, in particular point 5).
-
2x2, 4x4 and 8x8 Dithering: These modes improve the luminance and color resolution with a spatial dithering to a 10, 12 and 14 bit resolution, which provide 1024, 2048 and 4096 intensity levels per chromatic component, respectively. It is important to note that this improvement is accompanied by a loss in spatial resolution which is divided by 2, 4 and 8 and that translates into bigger "blocky" pixels. The use of large, smooth and low spatial frequency stimuli and a longer viewing distance are consequently recommended to minimize visual artifacts.
References:
Bach M., Meigen T. & Strasburger H. (1997) Raster-scan cathode ray tubes for vision research - limits of resolution in space, time and intensity, and some solutions. Spatial Vision, 10(4):403-414 (HTML Link)
Tyler, C.W. (1997) Colour bit-stealing to enhance the luminance resolution of digital displays on a single pixel basis. Spatial Vision, 10(4):369-377