Manage Subjects, Groups and Sessions
This step-by-step tutorial teaches you how to manage the subjects, groups and sessions. More specifically, you will learn how to add and remove subjects and groups, search through the subjects and sessions to retrieve particular sets of session, and add notes to them. Because Psykinematix automatically keeps track of the sessions history for each subject, you can use it as a powerful notebook.
Introduction
To start, click the Subjects button in the toolbar. This opens the Subjects panel as shown below.
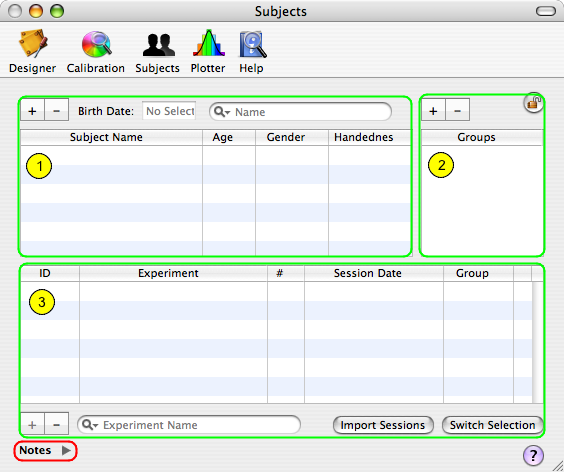
The Subjects panel consists of 3 tables that list the subjects, groups and sessions, each table having '+' and '-' buttons to add and remove entries.
Note the small arrow in the bottom-left corner marked Notes. Clicking this arrow reveals a drawer containing notes about the currently selected entities (subject, group and session).
Step 1. Managing the Subjects
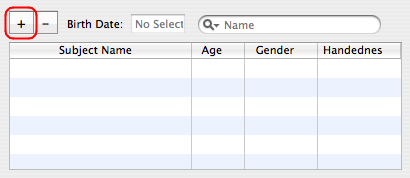
To add a subject, click the '+' button above the subjects table.
Double-click the default subject name to edit it, and enter the actual subject name.
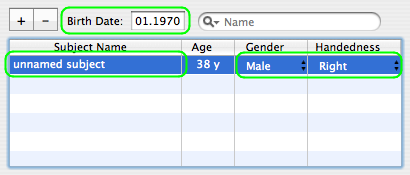
Use the popup menus inside the table to select the gender and handedness of the subject.
Make sure to select the subject in the table, and enter his/her birth date in the text field above the table and press the Return key to validate. The birth date should always be given as month.year, for example 01.1970 means January 1970.
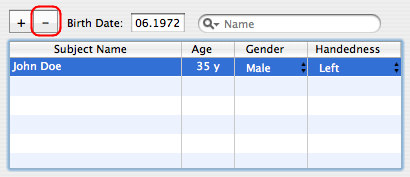
If you need to remove a subject, click the '-' button. An alert will ask for confirmation and inform you whether there are any sessions associated with the subject. It is important to note that all associated sessions will be deleted as well !
Step 2. Managing the Groups
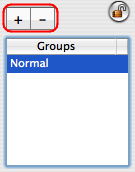
To add a group, click the '+' button above the groups table. Double-click the default group name to edit it, and enter the actual group name.
If you need to remove a group, click the '-' button. An alert will ask for confirmation and inform you whether there are any sessions associated with the group. It is important to note that all associated sessions will be deleted as well !
Step 3. Managing the Sessions

As Psykinematix maintains an history of all sessions, selecting a subject in table 1 automatically updates the content of the session table with all sessions previously run by this particular subject.
If you just started learning Psykinematix, it is likely you have not run any session yet. Go to the Experiments tutorials to learn how to create and run experiments, and come back later once one or more sessions have been run.

The available sessions for the selected subject can be sorted according to the column (alphabetically for ID,Experiment and Group columns, numerically for Session index #, and chronologically for the Date). The ascending or descending order is indicating by the direction of the small arrow in the header of the currently selected column.
If you need to delete a session, click the '-' button below the table. An alert will ask for confirmation. The files that actually store the session information will not be deleted, however we recommend to delete only sessions that do not contain any useful data (for example the sessions created while testing an experiment design).
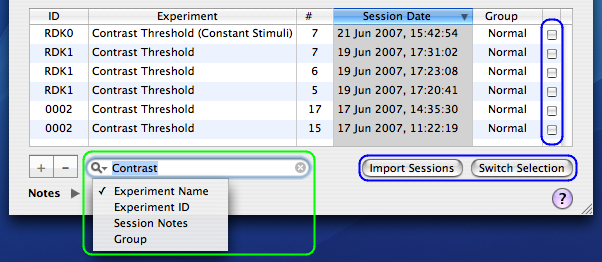
A search field is available below the Session table. A search can be performed according to several criteria: experiment name, experiment ID, content of session notes, group, etc. The table presents the subject's sessions filtered using the specified criterion.
Finally, an Import Sessions button allows you to import into the Plotter Panel all sessions checked in the last column (highlighted in blue). The Switch Selection button can be used to invert the import status of the currently selected sessions.
Step 4. Adding Notes
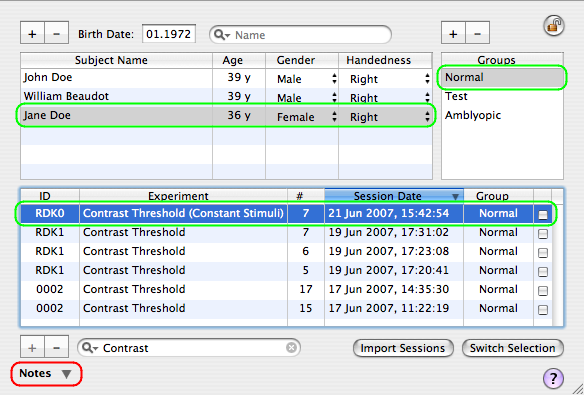
Clicking the small arrow in the bottom-left corner reveals the Notes drawer: if you have selected any subject, group or session in the tables, their notes are shown in the drawer.
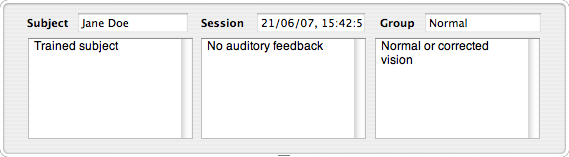
These notes can be edited to add, modify or remove details about the selections.
Conclusion
In this tutorial, you learned how to add, search, and annotate subjects, groups and sessions.